With the release of iOS 13 beta, many of us were very curious to download and install iOS 13 beta on iPhone but most of us failed in installing iOS 13 on our iPhone. There were many tutorials around the web. Even I tried many steps but it was a totally a waste of time.
So here we bring up the step by step tutorial on installing iOS 13 on iPhone without using XCODE or any other tools.
Let’s begin:
How to install iOS 13 on iPhone using Mac & Finder app without XCODE
Before installing iOS 13, make sure to back up and turn off Find My iPhone.
Step 1: Download the IPSW file of iOS 13 from the below where I have listed both for developer and non- developer account users.
List of iOS 13 Compatible devices
Download iOS 13 beta IPSW file for Developer Account
| iPhone 6s | Download |
| iPhone 6s Plus | Download |
| iPhone SE | Download |
| iPhone 7 | Download |
| iPhone 7 Plus | Download |
| iPhone 8 | Download |
| iPhone 8 Plus | Download |
| iPhone X | Download |
| iPhone XR | Download |
| iPhone XS | Download |
| iPhone XS Max | Download |
Download iOS 13 beta IPSW file for Non-Developer Account
- iPhone XS Max iOS 13.0 (17A5492t) – Mega.nz
- iPhone XS iOS 13.0 (17A5492t) – Mega.nz
- iPhone XR iOS 13.0 (17A5492t) – Mega.nz
- iPhone XiOS 13.0 (17A5492t) – Mega.nz
- iPhone 8 iOS 13.0 (17A5492t) – Mega.nz
- iPhone 8 Plus iOS 13.0 (17A5492t) – Mega.nz
- iPhone 7 iOS 13.0 (17A5492t) – Mega.nz
- iPhone 7 Plus iOS 13.0 (17A5492t) – Mega.nz
- iPhone SE iOS 13.0 (17A5492t) – Mega.nz
- iPhone 6s iOS 13.0 (17A5492t) – Mega.nz
- iPhone 6s Plus iOS 13.0 (17A5492t) – Mega.nz
- iPod Touch 7th Gen iOS 13.0 (17A5492t) – Mega.nz
However, installing iOS 13 betas on the iPhone is a little different than previous since Apple discontinued the iTunes. Now whatesle? How to get into iOS 13 without iTunes and XCODE?
Step 2: Now Upgrade your Mac to Catalina
Step 3: Connect your iPhone with the lightning USB cable to the Mac
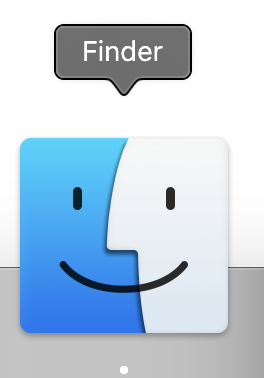
Step 4: Open Finder app on Mac
Step 5: Click on the Connected device and click on the Pair

Step 6: Next enter the passcode on your iPhone to pair
Step 7: Now, the interface you see would be the same as you saw on iTunes earlier when restoring or upgrading your device.

Step 8: Next press alt option and restore button on your Mac
Step 9: Now select the IPSW file that you have downloaded earlier

Step 10: Your iPhone will now begin to restore. So wait a moment and enjoy the iOS 13.

That’s it. You have successfully installed iOS 13 on iPhone using Finder app & Mac with macOS Catalina without XCODE or any other tool.
VERDICT
If you are so eager to install iOS 13 before its official release for Public then you can install with the above tutorial using Mac and Finder app and enjoy the iOS 13 new features.
How to Install iOS 13 Beta on iPhone Using Windows PC/Laptop(Opens in a new browser tab)
List Of iPhone & iPad That Will Support iOS 13 & iPadOS 13(Opens in a new browser tab)
This is How The New Volume Indicator Looks in iOS 13(Opens in a new browser tab)
How To Access WiFi & Bluetooth List With iOS 13 Control Center(Opens in a new browser tab)
